This article is part of a series of examples of editing illustrations.
This example is taken from one of the OpenOffice.org (OOo) user guides, which was being updated from OOo version 2 to version 3. I show the author’s instructions to the illustrator, the figure the illustrator produced, and my analysis and edit of the figure.
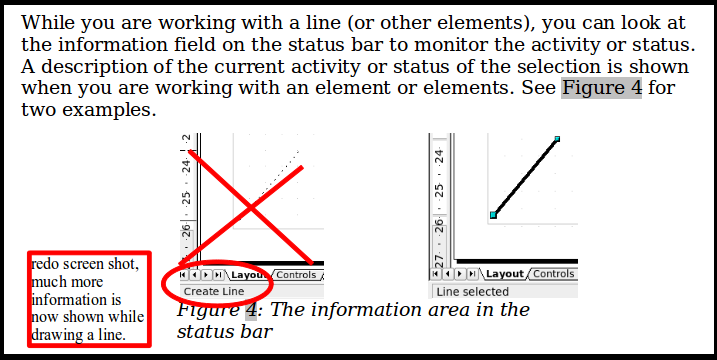
Below is the instruction by the person updating the text of the book to the person updating the illustrations. Notice that the original (version 2) picture was cropped tightly to show only the relevant part of the status bar at the bottom.

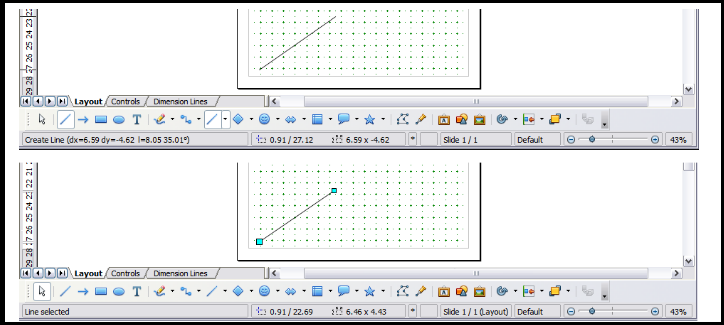
The next picture shows the revised illustration, which now shows the version 3 status bar.

The editor’s job is to critically examine this illustration and decide if it needs any improvement. Here are some questions to ask:
- Does this picture show what it is supposed to show?
- Is it clear and easy to see what is being illustrated?
- Should it be cropped and, if so, what should be cut off?
In my opinion, the picture should be cropped to cut out those parts of the status bar that show information that is not about the “current activity or status of the selection” as stated in the text.
Some knowledge of the program is needed at this point, to determine which elements in the status bar are relevant and which are not. The editor could refer to Chapter 1 of the book, which includes a description of the parts of the status bar.
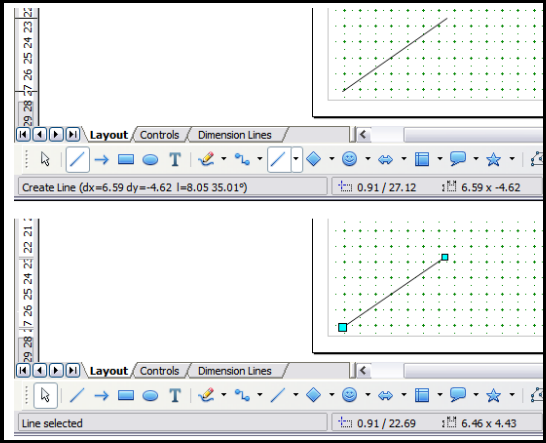
The next picture shows the edited illustration, which has cropped off the right-hand part of the original picture. I think this could be further improved, but for a quick edit it will do.

Comments are welcome.
